

Blog . Photoshop Tricks: Third Edition
Blog
Photoshop Tricks: Third Edition
12/02/14 | Posted by | Posted in Digital Creativity
Too Many Layers
There will come a time in every digital artist’s life, where one will find they have too many layers in their file. Naming your layers, placing them in folders, and even color-coding them is extremely helpful for keeping your piece functional and easy to work with, but sometimes things still get lost or out of place.
Never fear! Photoshop has a lovely little feature that will help you find out what layer something is on, and will even take you to it! First, click the Move Tool (or just press V), then find whatever part of your document you want to edit. Right click (or control+click) on the part of the piece, and a small list should appear.
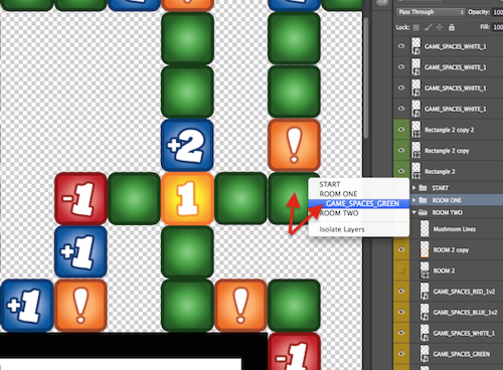
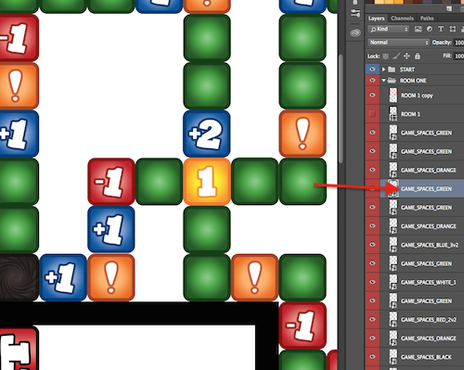
This list will show you any folders you have in your layers, as well as tell you Photoshop’s “best guess” as to what layer it is that you right clicked on. If you click on the name of the layer in the list, Photoshop will take you to it on your Layers tab, as well as make it the active layer.
Pretty cool, huh?
Replacing Object Layer Contents
Every piece of art has a different way of being approached. Some projects are simple and easy, others more complex with more steps. To save some time with some of the bigger projects, this next bit may prove useful. If you’re making a piece in which layers and objects need to be placed 100% accurately, and with utmost care, it can be a real pain. Take, for example, a deck of playing cards. Each card must have the exact same position of the icons, as well as the identifying symbol located in the left corner that tells us what card we have quickly. Continuously taking each icon, and painstakingly zooming in to 1000%, dragging each bit of the image until it is pixel for pixel on the mark is just too much.
So how does one work around such an awful thing? Image placing and replacing via Smart Object Layers, that’s how!
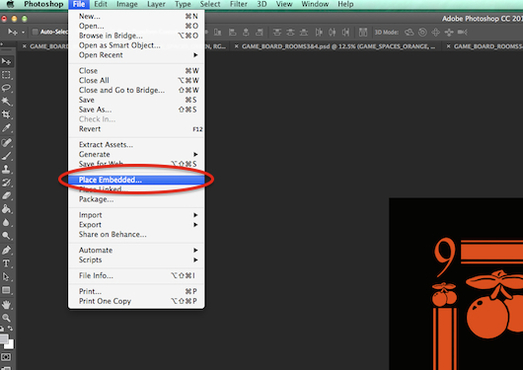
If you didn’t know, by going up to the main tab and clicking File, in the drop down list there is an option called “Place Embedded…” By clicking File>Place Embedded… one can insert images and other external files into their Photoshop document as a Smart Object Layer (which allows for some handy tricks to be used) and then continuously swap the layer’s contents for another image. This effectively allows you to avoid worrying about everything lining up perfectly, and helps get the job done faster.
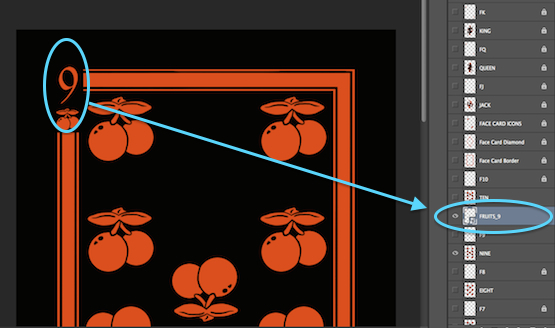
For instance, by embedding my “identifying icon” for my playing cards as a Smart Object, I can find the exact location that I want it to be in and continuously swap it out as I go. It’s a nine now, but what if I want it to turn into the five?
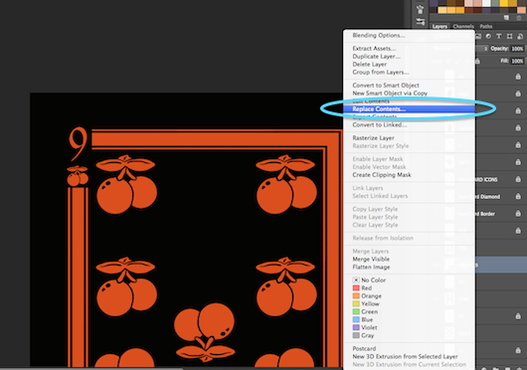
Go to the layer you wish to change…
Right click and go to Replace Contents…
Choose the file you want to swap the layer out with…
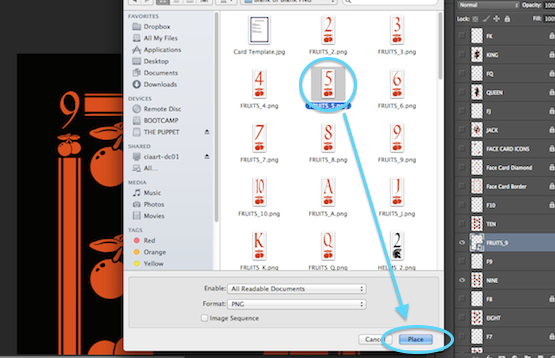
Tada!! It’s seriously that easy. (Just be sure that the image file you’re using to replace is the same size as the one you already had)
Swatch Swapping
Making the perfect set of swatches is one of the most satisfying parts of the process, at least for me anyway. But what if I want to take my set of swatches to use in other programs besides Photoshop, like Illustrator? With a few steps so simple it’s ridiculous you can do just that.
First, go to your swatches tab and click the tiny button that looks like a downwards-facing triangle next to three horizontal lines. This will bring up a list of options for your swatches. Go to and click “Save Swatches for Exchange…”
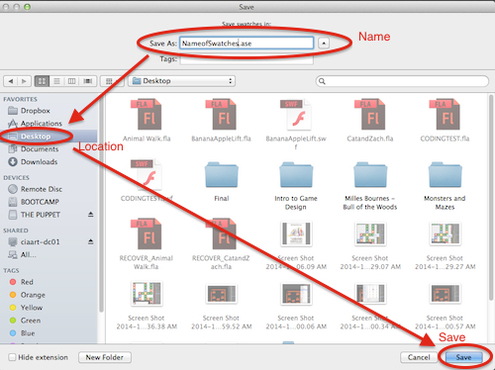
Like every other time you go to save a file, you will be prompted to name and choose where your file is saved.
Next, after saving your swatches, go to Illustrator and click the drop down button on the swatches tab. In the drop down list go to Open Swatch Library>Other Swatch Library and click it.
You will be prompted to open an .ase file (the file you just saved). Find it, click it, and hit open when finished. Your swatches you saved from Photoshop should appear in their own little tab, ready to be used in Illustrator!
Parting Messages
That’s all for this mini Photoshop session. Hopefully some of this information was useful, and gets your projects done faster and easier. Keep arting, and when in doubt, use Google!
-
Comments
0

- Tweet