

Blog . How To Batch Rename Files
Blog
11/05/13 | Posted by Leah Yochman | Posted in Digital Canvas - Tips & Tricks


If you ever have a lot of files that need to be numbered and named with specific information, there is an easier way to name them than manually naming each one.
For this tutorial I will be teaching you how to rename a group of files very quickly to help you save time.
Step 1.
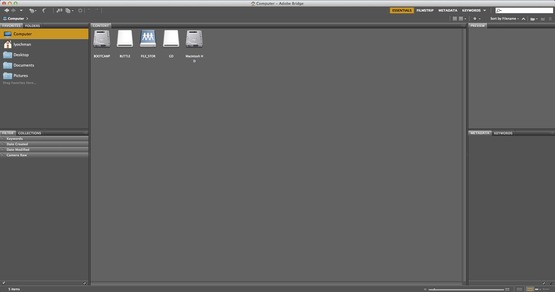
Open up Adobe Bridge, once it is open there will be a window with two options.
Step 2.
They are Favorites and Folder, click on Favorites and it will show you the options of “Computer,” “Desktop,” “Documents,” and “Pictures.”
Step 3.
My photos to be renamed are on my flash drive, so I selected “Computer,” “Flashdriver,” and "JPEGS.”
Step 4.
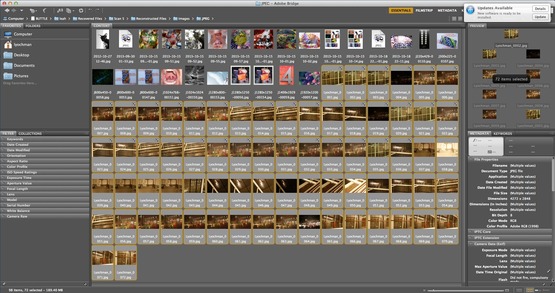
Select all of the photos you wish to be renamed.
Step 5.
Once all of the photos are selected, click on “Tools” at the top of the window.
Step 6.
Select “Batch Rename” which is the first option in the window.
Step 7.
A new, smaller, window will open and now you can select your options. You can make changes to the “Presets,” “Destination,” and “New File Name.” I chose to save my images to the same folder, along with having them all renamed “Lyochman.” I have also selected the “Sequence” number as being 1, so every image will have the file name “Lyochman,“ the date that you batch renamed them, and be numbered 1-72 since I have 72 photos.
Step 8.
If you do not want to have the date in the file name you can click on the “-“ next to “Date Time” in the Batch Rename options window.
-
Comments
0

- Tweet